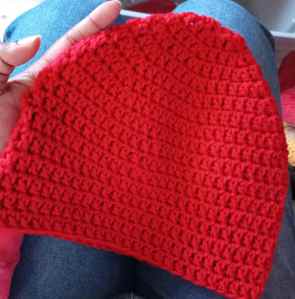
Hey guys, I have red crochet hats for sale in my etsy shop. I am working steadily as February is fast approaching and I feel like red is everyone’s fav. color. :)
As always you can reach out to me for custom orders on my etsy shop, anything that I can make I’m okay with.
and I have ready made items as well.
Thanks for stopping by.
Oh, baby hats, I am planning on stocking up on a few baby hats soon. It’s something I like to do, I worry about the little ones being taken care of.
That’s all for now guys, stay warm. My shop link is below. Have a good day. :) Plz subscribe to get updates like these to your inbox. With love, Stephanie.
Hey guys, how’s it going? I just wanted to do a quick update. 😄🧶My patterns are on my main shop of ya’ll are curious, I am still making them as well. And as always you can get them free here on my blog.
This is the link to my Etsy shop. Let me know if you would like me to make you anything while you are there, I don’t mind as long as it is something I can make. I look forward to it.
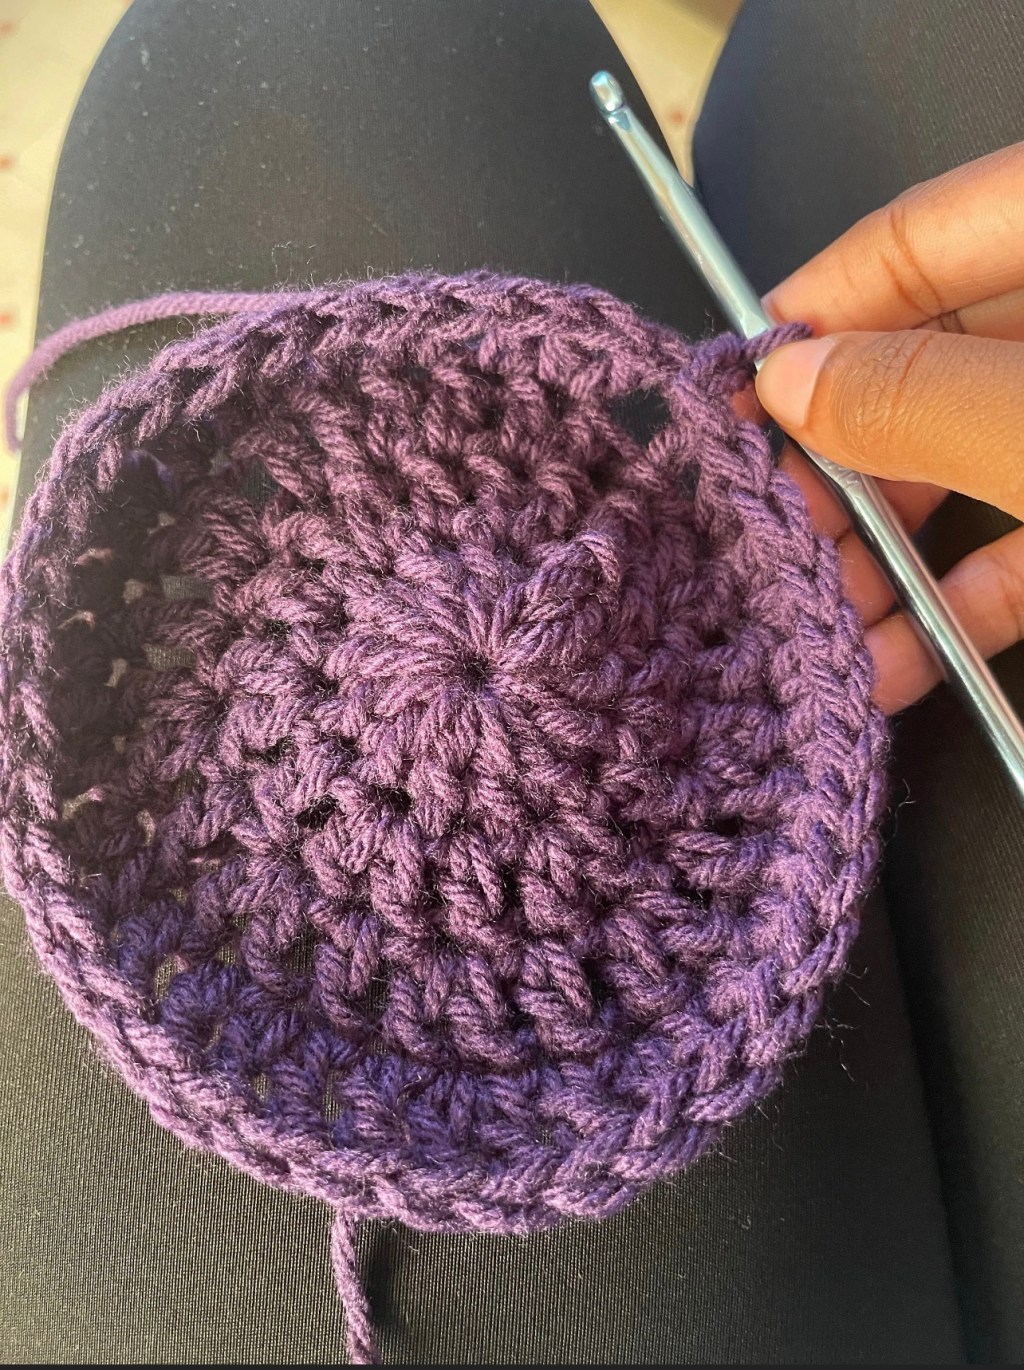
Hey, are you ready to learn how to crochet? Check out this crochet beanie pattern in my Etsy shop and let’s chat about it on here. It’s an easy beginner pattern, it features crochet basics that are worked in the round, all you do is start with a chain four, double crochet into the circle and follow the steps for each round with double crochet, complete the brim with single crochet and that’s it. This pattern is a slouch hat pattern which makes it really fun bc it is stylish and cute and you can make it in every size with the step by step size chart included. I hope you give it a try, it’s on sale until midnight. RMKNITWEARONLINE on Etsy. #rmknitwear #rosemaeknitwear #crochet #learntocrochet #crochettutorial
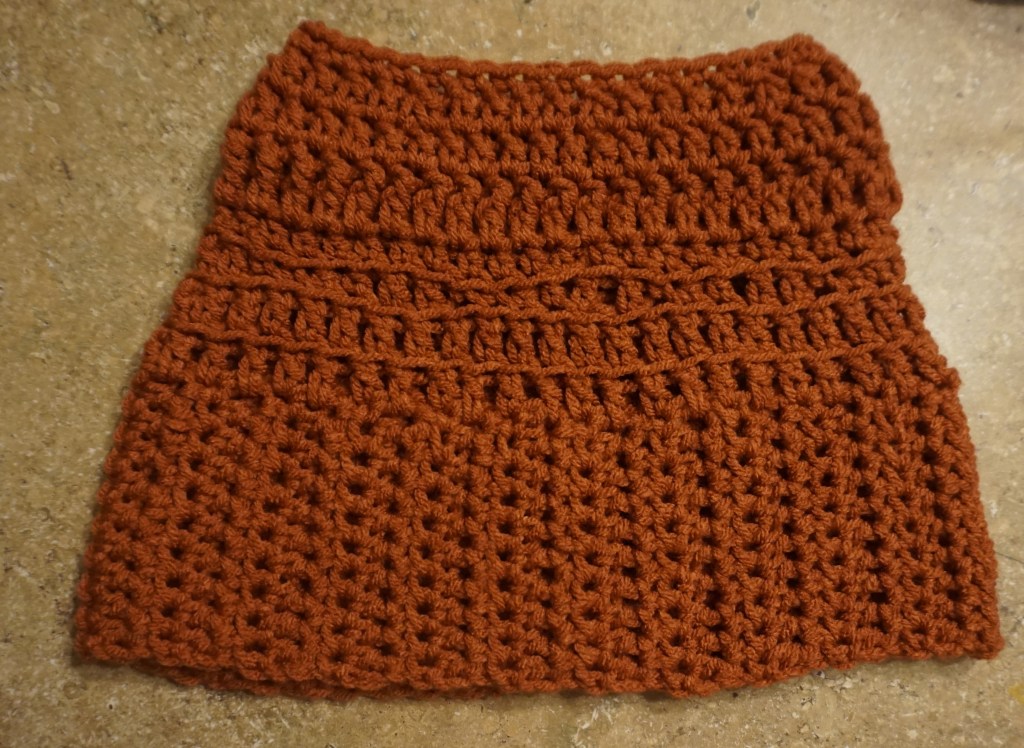
What you will need A 5.5 mm crochet hook size I One ball of worsted weight yarn Measuring tape Scissors Stitch markers Sewing/Darning needle The yarn that I used is ginger by loops and threads found at Michaels craft stores. The pattern The brim Chain 12 Single crochet into the second stitch and then each stitch across Chain one at the end of the row Turn your work Single crochet in each stitch across Chain one Work the single crochet stitch all the way across back and forth (turning your work )in each stitch until it measures 22 inches. Remember to chain one at the end of each row before turning your work Put the ends together and slip stitch with the crochet hook across through both stitches of each end. Slip stitch all the way across to the end of the bar row of stitches. Chain one. It should look like a headband now. Flip it right side out. You should see your seam like a seamless join as if it’s not there. The hat portion Double crochet in each blank space around the headband for about 37 stitches around. This is very tricky, be careful, it’s easy to skip stitches. Next page… The hat portion continued… Chain 2 Double crochet in the back of each stitch around. the back would be the line of the top of the stitch closest to your hand holding your hook which is your working hand. Chain 2 Slip stitch into the top of the first stitch to join for the next round. Chain 2 Continue with the same pattern as before except this time instead of double crocheting in every stitch, we are gonna work this sequence below all the way around. Double crochet, single crochet, single crochet, slip stitch, double crochet. REPEAT this all the way around for this round. The sequence should end with a slip stitch. Join for working in the round by slip stitching into the top of the first stitch you get to at the end of the round. Chain 2 Single crochet into the back of each stitch around Join for working in the round Double crochet in each stitch around To be continued on the next page… The hat portion continued again Chain 2 Front post double crochet all the way around Join Chain 2 Double crochet all the way around in each stitch around Join Chain 2 Repeat the next two steps all the way around Double crochet two stitches together in the first two stitches Double crochet once in each of the next four stitches Join Chain 2 Repeat the next two steps all the way around Double crochet two stitches together in the first two stitches Double crochet once in each of the next four stitches When you get to the end of the round you may get to this; double crochet 2 together and double crochet 4 in each of the next 4 stitches until the end of the round and be like wait, there’s one stitch left, what do I do?? Just double crochet into that stitch. Okay back to the pattern, almost donneee. :) Join Chain one Put a stitch marker here Slip stitch all the way around until you get to the last stitch In and at the last stitch join and pull the yarn through the loop Remove the stitch marker Cut about a six inch tail Weave in the ends at the top and bottom Enjoy your new harmony bun beanie The next page features measurements and stuff
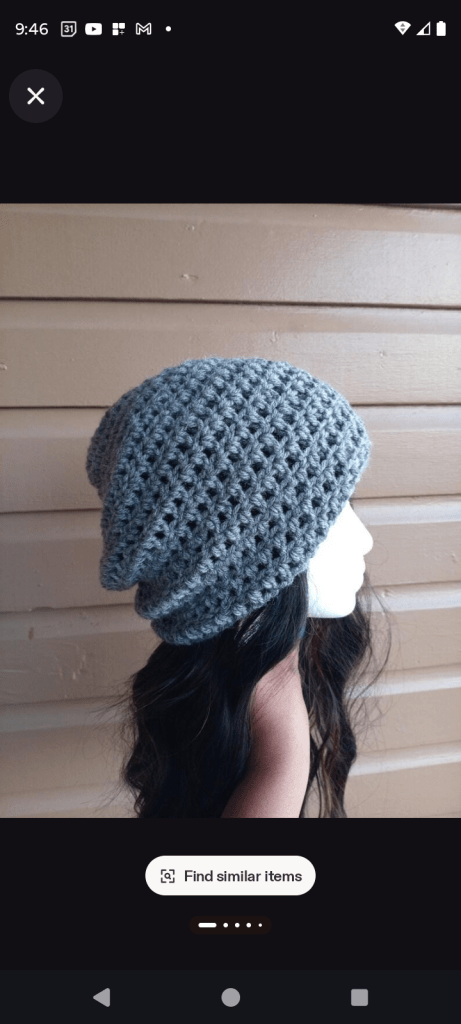
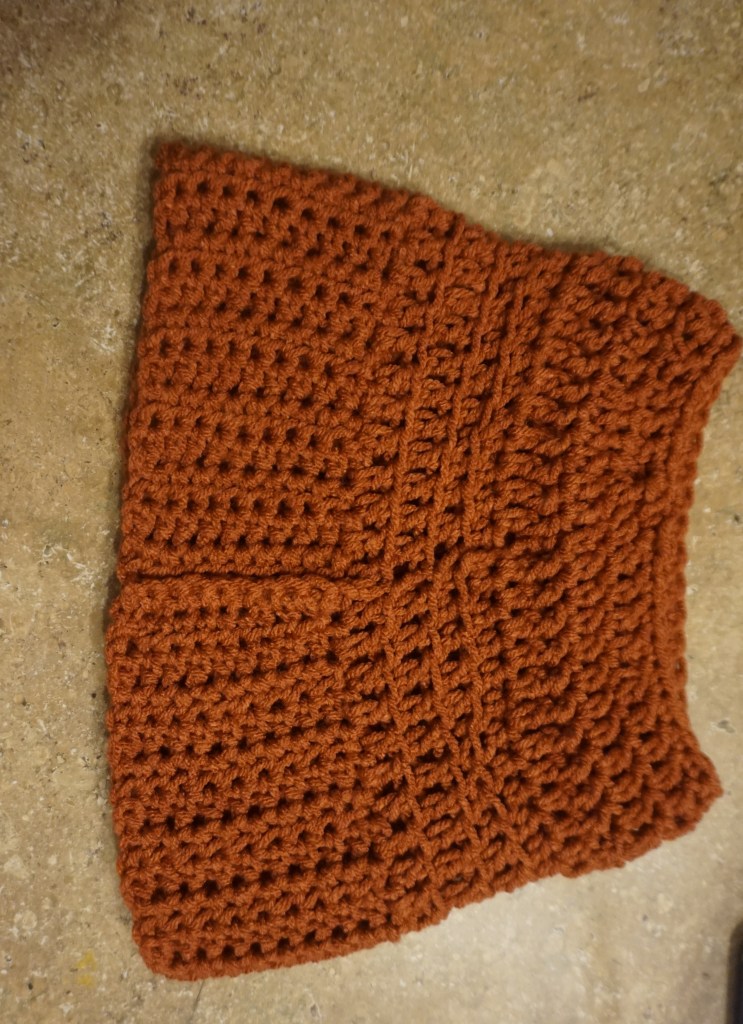
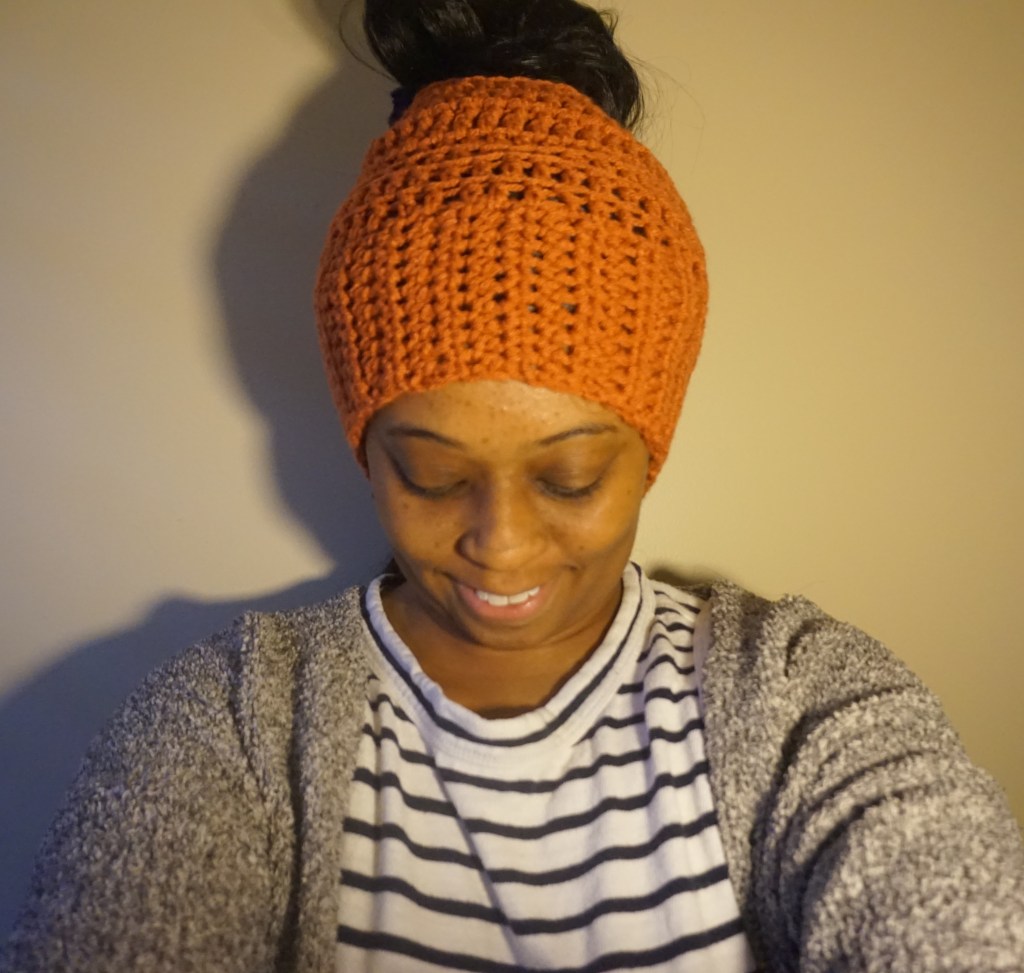
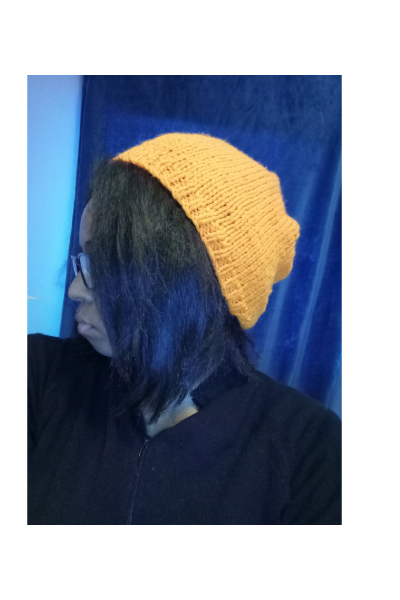
Finished measurements for the harmony bun beanie Headband/Brim Length 10 inches Width 3 ½ inches Hat Length 8 inches Width 8 inches The first picture is the front, the second is the back and the third is a modeled picture. Note, the pictures are from after me wearing it and the last one is me wearing it.
Pattern by Steph.s patterns of Rose Mae Knitwear September 17, 2025 rosemaeknitwear.art.blog stephspatterns.com
To purchase a pdf pattern please click the link below.
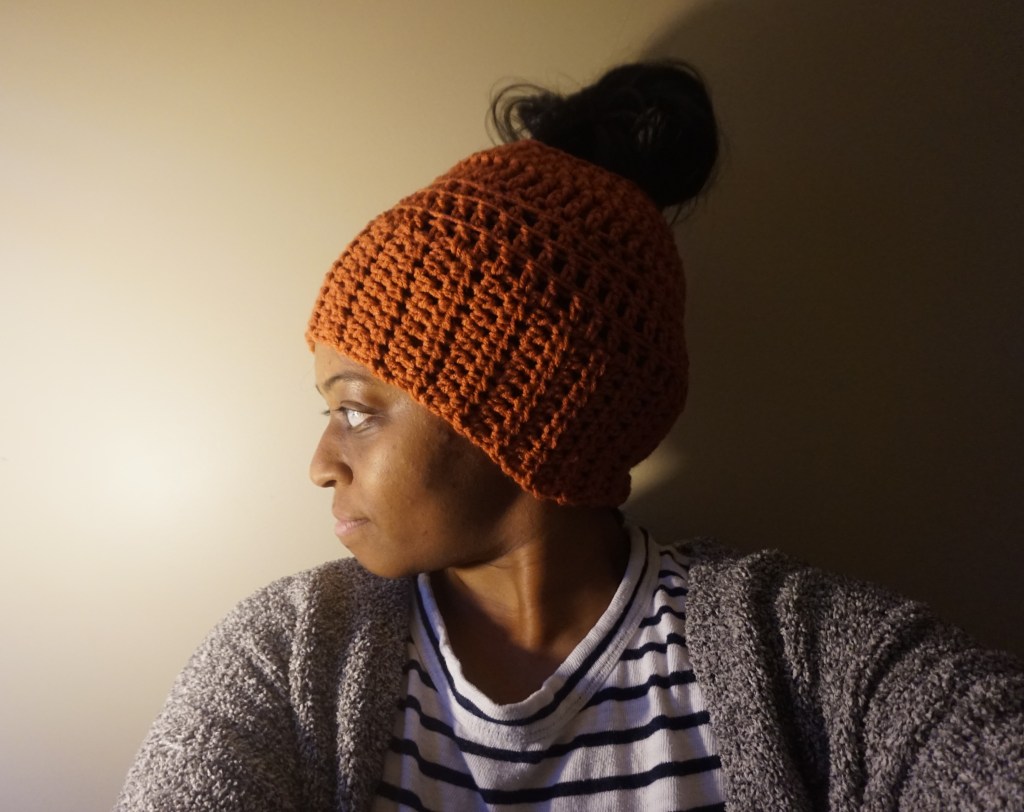
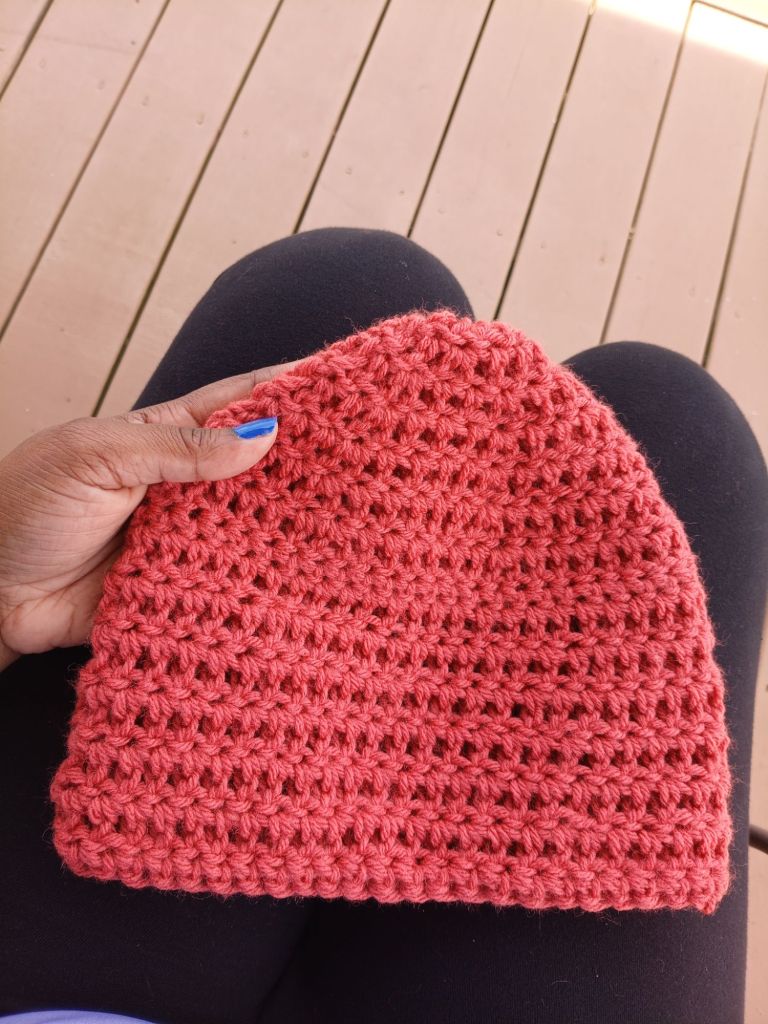
Hi everyone, I just wanted to take a moment to update ya’ll. I finally, finally got this yarn color at Walmart that I have been wanting. It is called coral. I made a beanie with it of course, if you want to check it out, maybe buy it, the link is below. See ya’ll next time.
My patterns. I started knitting and crocheting in my 20’s and that led to starting my knitwear brand. I would really like to pass it on to my niece, and Lord willing my daughter someday if the Lord blesses me with a baby girl someday. That would be really cool for it to be passed down through generations. 😄
Hey ya’ll. I made this video some time ago and I figured maybe someone needs it to have some help with knitting. If you have any questions, please comment below.
One skein of your favorite worsted weight yarn, a size 4 at Walmart or your local craft store.
A tapestry (darning) needle.
Circular knitting needles size 9 5.5 mm., 16”.
A swatch ruler to measure to get gauge.
Measuring tape.
For crafting only scissors.
What you will need to know:
How to knit
How to knit the knit stitch flat
How to join stitches to work in the round
How to knit 1×1 ribbing (knit and then purl)
How to stitch up the hat with a tapestry needle (darning needle)
The pattern
Step 1
To get started, first let’s make a gauge swatch. Start with knitting a flat square. Start with casting on 16 stitches. You will need to knit 1” of 1×1 ribbing, followed by 21 rows of the knit stitch. This is for the standard 4×4 swatch.
Now that you have knitted your swatch you can determine if you will need to increase or decrease stitches and how many rows of ribbing you will need to knit by measuring the ribbing to 1” and the whole swatch to 4×4”.
Step 2
To begin the hat, cast on 88 stitches.
Step 3
Join for working in the round.
Step 4
Knit 1” of 1×1 ribbing.
Step 5
Work the knit stitch for a total of 45 rows.
Step 6
Let’s measure; the finished hat should be 10.5” across and 8.5” top to bottom.
Step 7
Cut a 12” tail.
Step 8
Use a tapestry needle (darning needle) to get the stitches off the knitting needles by casting off, (pick the stitches off the needle with the darning needle) flip the hat inside out, then pull the center of the hat tight, next weave in the end through the center.
Step 9
Cut off the end of the tail, then go back to the beginning (at the brim) and weave in the end.
Step 10
Flip the hat right side out.
You now have just completed your very own knit hat.
That’s all, I hope this pattern helped you to make a knit hat. Enjoy!
You may use this pattern to sell finished items. Please leave a review and feel free to message me if you have any questions.
rosemaeknitwear.art.blog
Etsy.com/shop/stephspatterns
Stephanie Lewis, Owner and Maker of Rose Mae Knitwear
May 21, 2025
You can get a printable of this pattern on my Etsy shop at the link button below.
One skein of your favorite bulky weight yarn, size 6. For this pattern I used Lion Brand’s Wool Ease Thick and Quick in the color Fisherman.
A tapestry (darning) needle.
Circular knitting needles size 11 8mm 16”.
A swatch ruler to measure to get gauge.
Measuring tape.
For crafting only scissors.
What you will need to know:
How to knit
How to purl
How to knit the knit stitch flat
How to join stitches to work in the round
How to knit 2×2 ribbing (knit 2 and then purl 2)
How to stitch up the hat with a tapestry needle (darning needle)
The pattern
Step 1
To get started, first let’s make a gauge swatch. Start with knitting a flat square. Start with casting on 10 stitches. You will need to knit 2” of ribbing, followed by 7 rows of the knit stitch. This is for the standard 4×4 swatch.
Now that you have knitted your swatch you can determine if you will need to increase or decrease stitches and how many rows of ribbing you will need to knit by measuring the ribbing to 2” and the whole swatch to 4×4”.
Step 2
To begin the hat, cast on 35 stitches for the baby hat, size 3-6 months
Cast on 45 stitches for one size fits most
Cast on 49 stitches for a large
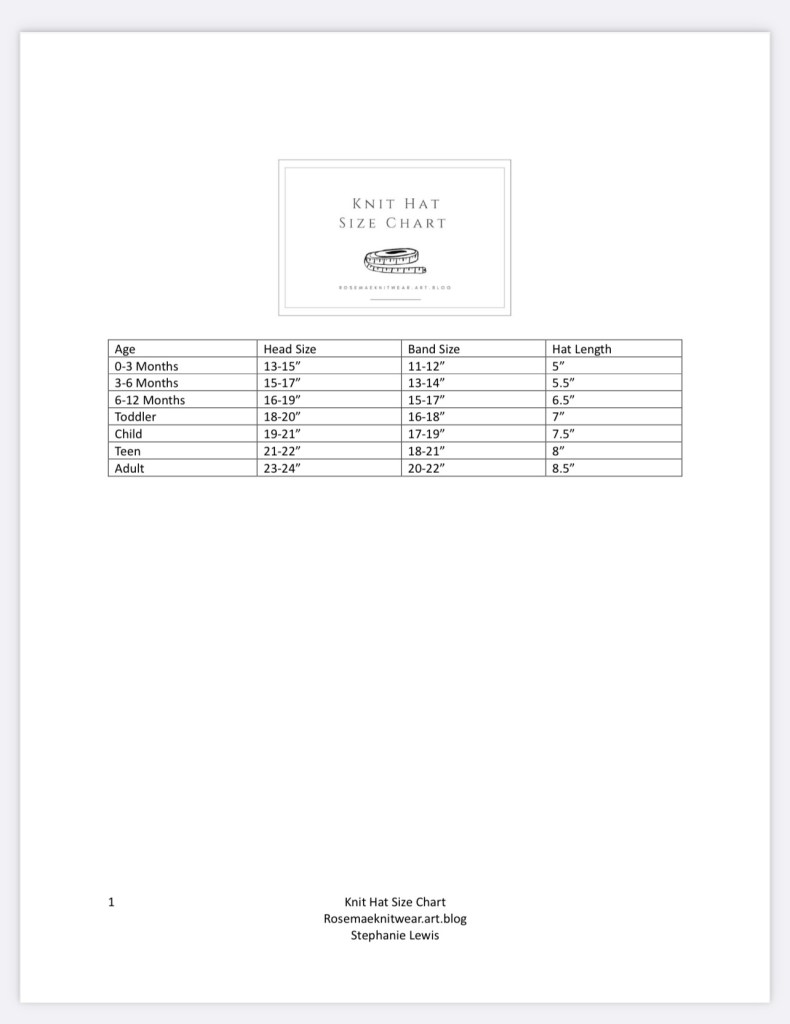
(for more sizes please see the chart on the last page)
Step 3
Join for working in the round.
Step 4
Knit 2” of 2×2 ribbing.
Step 5
Work the knit stitches for a total of
18 rows for the baby hat and
22 rows for the one size fits most and the large.
Step 6
Let’s measure; the finished hat should be
8” top to bottom and 6” across for a total circumference of 12” for the baby hat
10” across and 10” top to bottom for a total circumference of 20” for the one size fits most
10” top to bottom and 12” across for a total circumference of 24” for the large
Step 7
Cut a 12” tail.
Step 8
Use a tapestry (darning needle) needle to get the stitches off the knitting needles by casting off.
Step 9
Flip the hat inside out and stitch the hat together by covering up the hole and then weave in the ends and cut off the rest of the tail.
Step 10
Weave in the ends from the beginning of the hat.
Step 11
Flip the hat right side out.
That’s all, I hope this pattern helped you to make a knit hat either for you or for your favorite person. Enjoy!
You may use this pattern to sell finished items. Please leave a review and feel free to message me if you have any questions.
rosemaeknitwear.art.blog
etsy.com/shop/stephspatterns
Stephanie Lewis, Owner and Maker of Rose Mae Knitwear
September 18, 2023, Updated November 22, 2024
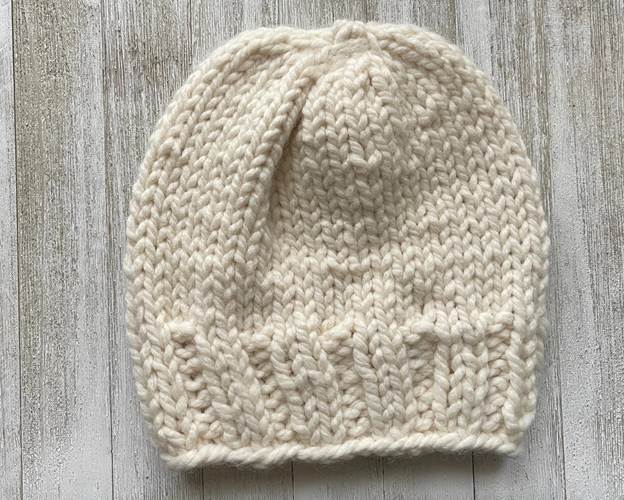
The hat in this photo is for one size fits most.
Baby 3-6 Months
cast on 35 stitches
18 rows
8” top to bottom and 6” across for a total circumference of 12”
Baby 6-12 Months
cast on 37 stitches
18 rows
8” top to bottom and 6.5” across for a total circumference of 13”
Toddler, ages 1-4
cast on 39 stitches
18 rows
8” top to bottom and 7” across for a total circumference of 14”
Children
cast on 41 stitches
20 rows
8” top to bottom and 7.5” across for a total circumference of 15”
One Size Fits Most
cast on 45 stitches
22 rows
10” across and 10” top to bottom for a total circumference of 20”
Large
cast on 49 stitches
22 rows
10” top to bottom and 12” across for a total circumference of 24”
This pattern is free, the link to Etsy is for any one that would like to give to support my hobby by purchasing a downloadable printable pattern.
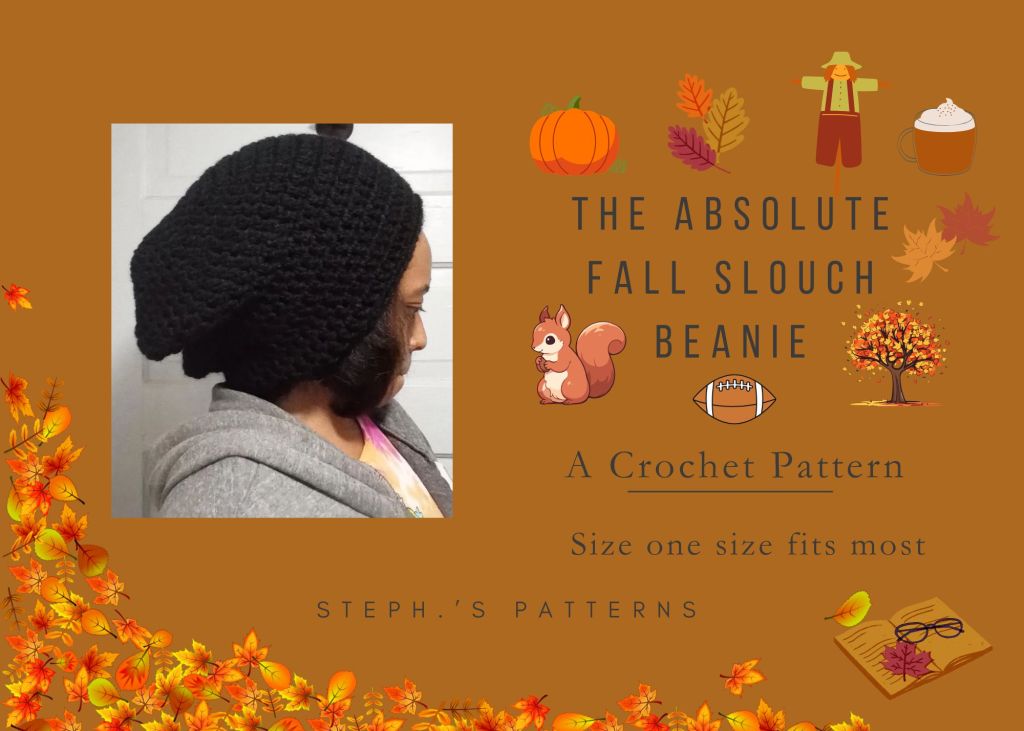
The absolute fall slouch beanie, a crochet beanie pattern
What you will need
Four ounces of worsted weight yarn
A tapestry needle
A size I crochet hook, 5.5 mm
A Swatch ruler to measure to get gauge
Measuring tape
For crafting only scissors
What you will need to know
How to join for working in the round
How to double crochet
How to slip stitch
How to stitch in the ends with a tapestry needle
The Gauge Swatch
Chain 10 and double crochet across for 7 rows. This should measure 4 inches by 4 inches. If you don’t get gauge, try upsizing or downsizing your hook. Everyone’s tension is different, and some yarns are different too.
The Pattern
Make a slip knot and chain 4.
Double crochet 12 within the circle.
Round 1 Double crochet 2 in the first stitch, then double crochet 1 in the next stitch. Repeat this all the way around until you get back to the beginning. Chain 2 Slip stitch into the first stitch.
Round 2 Double crochet 2 in the first stitch, then double crochet 2 in each of the next 2 stitches. Repeat this all the way around until you get back to the beginning. Chain 2
Round 3 Double crochet 2 in the first stitch, then double crochet 3 in each of the next 3 stitches. Repeat this all the way around until you get back to the beginning. Chain 2
Round 4 Double crochet 2 in the first stitch, then double crochet 4 in each of the next 4 stitches. Repeat this all the way around until you get back to the beginning. Chain 2.
Round 5 Double crochet 2 in the first stitch, then double crochet 5 in each of the next 5 stitches. Repeat this all the way around until you get back to the beginning. Chain 2.
Round 6
Double crochet 2 in the first stitch, then double crochet 6 in each of the next 6 stitches. Repeat this all the way around until you get back to the beginning. The circle should measure 8 inches. Chain 2.
Rounds 7 through 11
Double crochet in each stitch around, don’t forget to chain 2 at the end of each round. At the end of round 11 chain 2.
Round 12
Slip stitch in each stitch around.
Chain 1.
Pull about 5 inches of yarn from that chain one and cut the yarn.
Weave in the end and cut the yarn.
Go back to the top and weave in the yarn there too and cut the tail.
The finished beanie measurements, length 11 inches and width 26 inches.
That’s all, I hope this pattern went well for you. Enjoy your new beanie!
You may use this pattern to sell finished items.
If you have any questions, feel free to message me. Rosemaeknitwear.art.blog
Stephanie Lewis, Owner and Maker of Rose Mae Knitwear and Steph.’s Patterns.
August 17, 2024
The pattern is free, the link is to my Etsy shop which is for any one that would like a downloaded copy or to give to support my hobby.
Chain 10 and double crochet across for 7 rows. This should measure 4 inches by 4 inches. If you don’t get gauge, try upsizing or downsizing your hook. Everyone’s tension is different, and some yarns are different too.
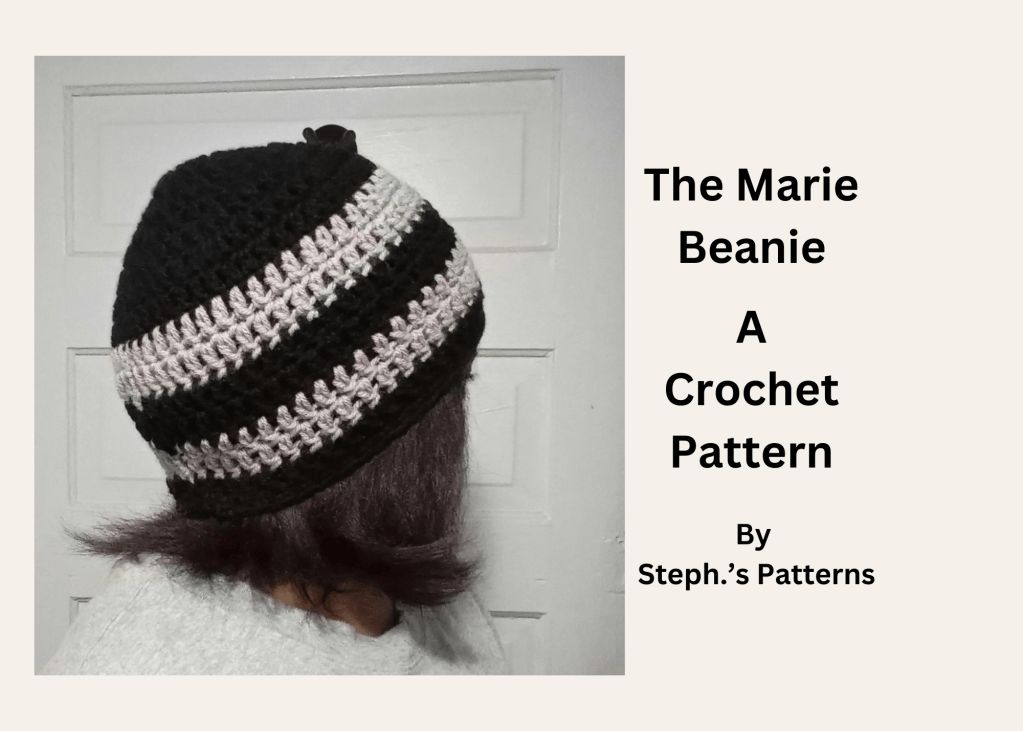
Color Changes
To switch from one color to another drop the yarn that is in the hand that is not holding the crochet hook and pick up the other color that you want to use. Next, grab the yarn with the crochet hook with the hand that is holding the crochet hook and begin to double crochet with that yarn color. Be sure to cut a 5 inch tail each time you stop crocheting with a color. The ends can be weaved in at the end of your project.
The Pattern
Make a slip knot and chain 4.
Double crochet 12 within the circle.
Round 1
Double crochet 2 in the first stitch, then double crochet 1 in the next stitch. Repeat this all the way around until you get back to the beginning. Chain 2 Slip stitch into the first stitch.
Round
Double crochet 2 in the first stitch, then double crochet 2 in each of the next 2 stitches. Repeat this all the way around until you get back to the beginning. Chain 2 Slip stitch into the first stitch.
Round
Double crochet 2 in the first stitch, then double crochet 3 in each of the next 3 stitches. Repeat this all the way around until you get back to the beginning. Chain 2 Slip stitch into the first stitch.
Round 4
Double crochet 2 in the first stitch, then double crochet 4 in each of the next 4 stitches. Repeat this all the way around until you get back to the beginning. Chain 2. Slip stitch into the first stitch.
Round 5
Double crochet 2 in the first stitch, then double crochet 5 in each of the next 5 stitches. Repeat this all the way around until you get back to the beginning. Chain 2. Slip stitch into the first stitch.
Round 6
Double crochet 2 in the first stitch, then double crochet 6 in each of the next 6 stitches. Repeat this all the way around until you get back to the beginning. The circle should measure 8 inches. Chain 2. Slip stitch into the first stitch.
Rounds 7-9
Add in your second color. (see instructions for this on page one)
Double crochet in each stitch around and chain 2. Do this for a total of 2 rounds, Chain 2. Slip stitch into the first stitch.
Rounds 10-11
Add in your first color. (see instructions for this on page one)
Double crochet in each stitch around and chain 2. Do this for a total of 2 rounds, Chain 2. Slip stitch into the first stitch.
Rounds 11-12
Add in your second color. (see instructions for this on page one)
Double crochet in each stitch around and chain 2. Slip stitch into the first stitch.
Rounds 12-13
Add in your first color. (see instructions for this on page one)
Double crochet in each stitch around and chain 2. Slip stitch into the first stitch.
Slip stitch in each stitch around, slip stitch into the first stitch. do this for 2 rounds.
At the end of the round, cut a 5 inch tail and weave in the end.
Don’t forget to go back and weave in the end where you started and at each round where you did color changes.
The finished hat should measure 22 inches in circumference and a 9 inch length top to bottom.
All done.
That’s all, I hope this pattern went well for you. Enjoy your new beanie!
You may use this pattern to sell finished items.
If you have any questions, feel free to message me. Rosemaeknitwear.art.blog
Stephanie Lewis, Owner and Maker of Rose Mae Knitwear and Steph.’s Patterns.
January 5, 2025
This pattern is free. The link to Pay pal is for any one that would like to give to support my hobby.
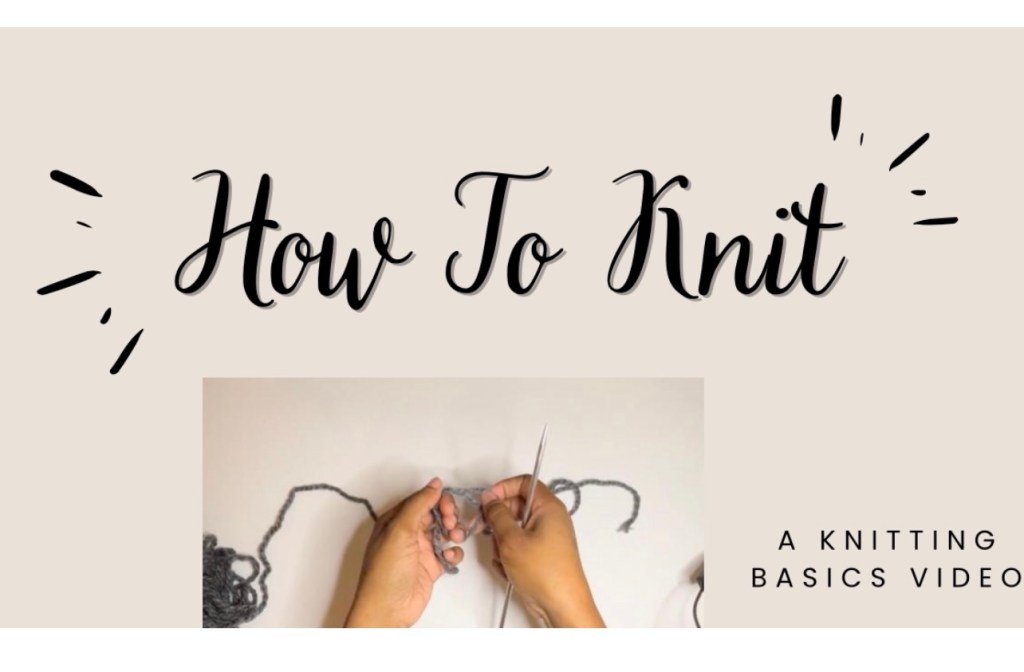
If you are looking to learn how to knit or know someone that is looking to learn how to knit, check out this video or share this with them.
Learn how to Knit
If you have any questions, feel free to message me and if you are looking for some patterns to get going with knitting, I have a sale running in my shop. All patterns are currently 50% off.
Hey everyone, after years of being a maker, I finally wrote and released my first ever pattern. This pattern is from making a beanie for and while I was working at Starbucks. Sadly it had gotten pushed aside with all of my other wips (works in progress) and I didn’t finish it until last night.
I don’t know what pushed me to write the pattern up and post it, probably from watching Andrea Mowry’s Podcast/Blog’s on YouTube. Lol. Or maybe it’s just God pushing me to start designing and making patterns to sell.
I have always loved fashion and when I graduated High School I wanted to go to Art School at the Art Institute in Dallas. Long story short, I never went or was able to go.
Instead I found myself years later studying fitness and working towards a Degree in Sociology.
My mom had bought me a sewing machine for Christmas a few years ago but it had broke. And yes of course I got a new one a few years back and started up cycling clothes but it’s not really my thing.
I found a passion for crochet a few years back in my early 20’s. I had bought a set of knitting looms and yarn in 2012 and thought maybe I should try crochet again. My Grandma, Grandma Rose had tried to teach me how to crochet when I was a kid but I didn’t really catch on to it or have much of an interest in it. It took me getting bored and wanting something to do after work besides be bored and read books. Sadly crocheting kinda pulled me away from reading books because it’s not easy like it sounds to crochet and read books but I still tried to make time for it.
Shortly after learning to crochet, I bought some knitting needles but didn’t catch on to it until 2017.
Since then I have been loving knitting more than crocheting. I find that I am faster at it and I think that it has more of an elegant look to it. Maybe that’s just me.
Most of the items that I make are from my own pattern by me just figuring it out. Although I didn’t go to school to learn more about fashion I am glad that I have been able to make things with knitting and crocheting and now start writing patterns.
But I’ll stop there. Lol.
This pattern is very easy to follow and it require’s basic knitting skills such as joining in the round, the knit stitch and the purl stitch and of course everyone’s favorite, cinching (stitching) it up and weaving in those ends. Gotta love it right?
It require’s two of your favorite colors or even double of the same color. Even if you choose to do double of the same color, I recommend buying two skeins of it just to have an easier and stress free time knitting.
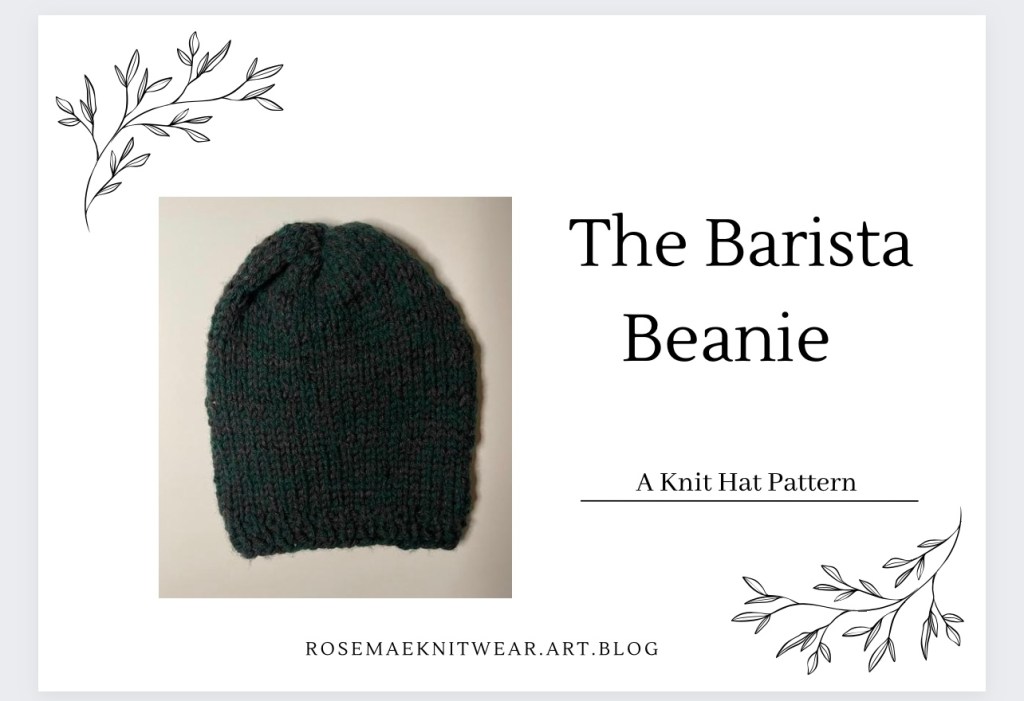
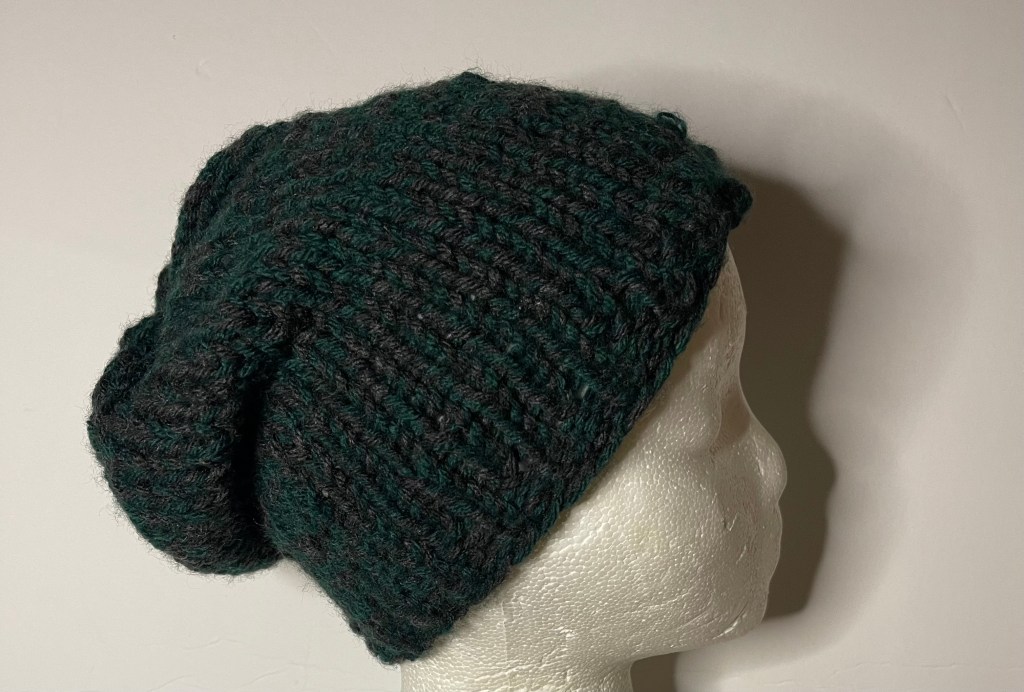
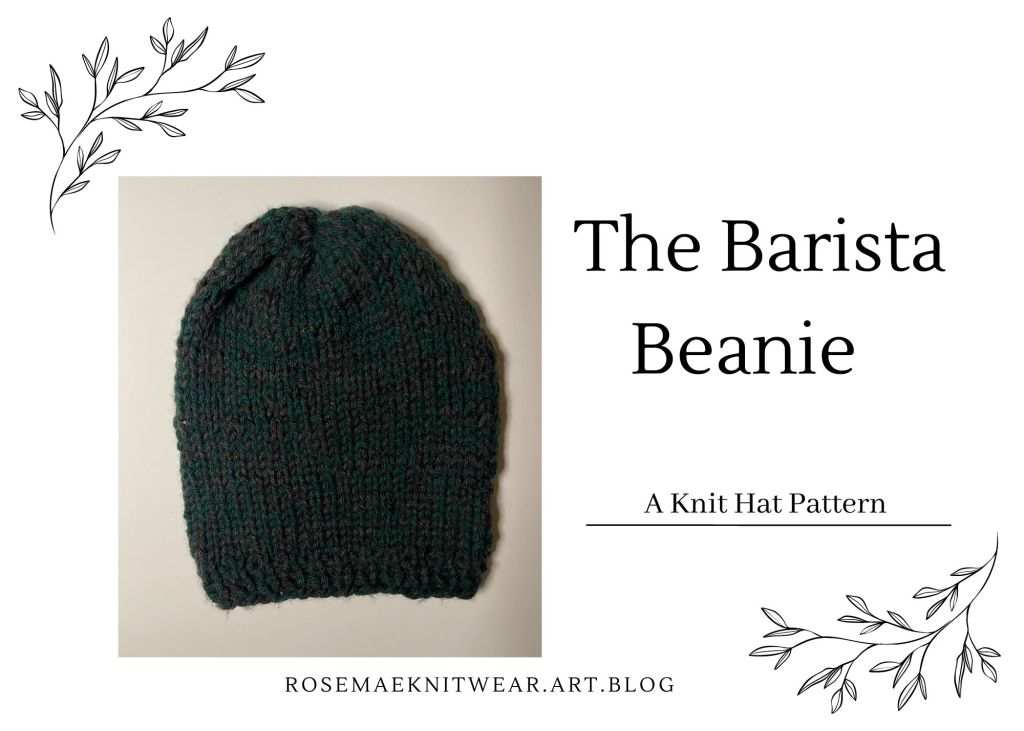
The Barista Beanie, A Knit Hat Pattern
What you will need
Two skeins of your favorite worsted weight yarn. ( A size 4 at Walmart or your local craft store.
A tapestry (darning) needle.
Circular knitting needles size 9 5.5 mm., 16”.
A swatch ruler to measure to get gauge.
Measuring tape.
For crafting only scissors.
What you will need to know:
How to knit
How to knit the knit stitch flat
How to join stitches to work in the round
How to knit 1×1 ribbing (knit and then purl)
How to stitch up the hat with a tapestry needle (darning needle)
To get started, first let’s make a gauge swatch. Start with yarn held double and knit a flat square. Start with casting on 18 stitches. You will need to knit 1” of 1×1 ribbing, followed by 12 rows of the knit stitch. This is for the standard 4×4 swatch.
Now that you have knitted your swatch you can determine if you will need to increase or decrease stitches and how many rows of ribbing you will need to knit by measuring the ribbing to 1” and the whole swatch to 4×4”.
Step 2
To begin the hat, cast on 56 stitches, remember its yarn held double.
Step 3
Join for working in the round.
Step 4
Knit 1” of 1×1 ribbing.
Step 5
Work the knit stitch for a total of 40 rows.
Step 6
Let’s measure; the finished hat should be 7.5” across and 9.5” top to bottom.
Step 7
Cut a 12” tail. Step 8
Use a tapestry (darning needle) needle to get the stitches off the knitting needles by casting off.
Step 9
Flip the hat inside out and stitch the hat together by covering up the hole and then weave in the ends and cut off the rest of the tail.
Step 10
Weave in the ends from the beginning of the hat.
Step 11
Flip the hat right side out.
That’s all, I hope this pattern helped you to make a Barista Beanie, either for you or for your favorite Barista. Enjoy!
You may use this pattern to sell finished items. Please leave a review and feel free to message me if you have any questions. rosemaeknitwear.art.blog
Etsy.com/shop/knitandstitchbysteph
Stephanie Lewis, Owner and Maker of Rose Mae Knitwear
July 1, 2023, Updated February 25, 2024
Thanks for stopping by, Steph.
This pattern is free, the link is to my Etsy shop for a downloadable copy.
Hi, welcome to my knitwear blog. My name is Stephanie but I go by Steph. I have been working with yarn for over a decade and I decided to start a serious blog to share my work.
I live in South West Louisiana, and I enjoy working on my life coaching brand and fitness career when I am not in my craft corner working on items for markets or commissions.
Since I do live in Louisiana where it is mostly hot, for me my peak is from late August to February but I tend to find myself working throughout the year with picking up momentum in late July and early August.
But I really do enjoy being a maker.
I hope you enjoy my blog. Please subscribe for updates on new posts and if you are local, for updates on markets and pop up shops.
Until next time, Steph.
Owner, Maker, and CEO (chief everything officer) lol of Rose Mae Knitwear
To browse what’s for sale, check out the link below.